Configure initial settings
Learn how to configure the initial settings in order to access the production platform.
Integration settings
To go live, you need to provide the following information in the Integration section:
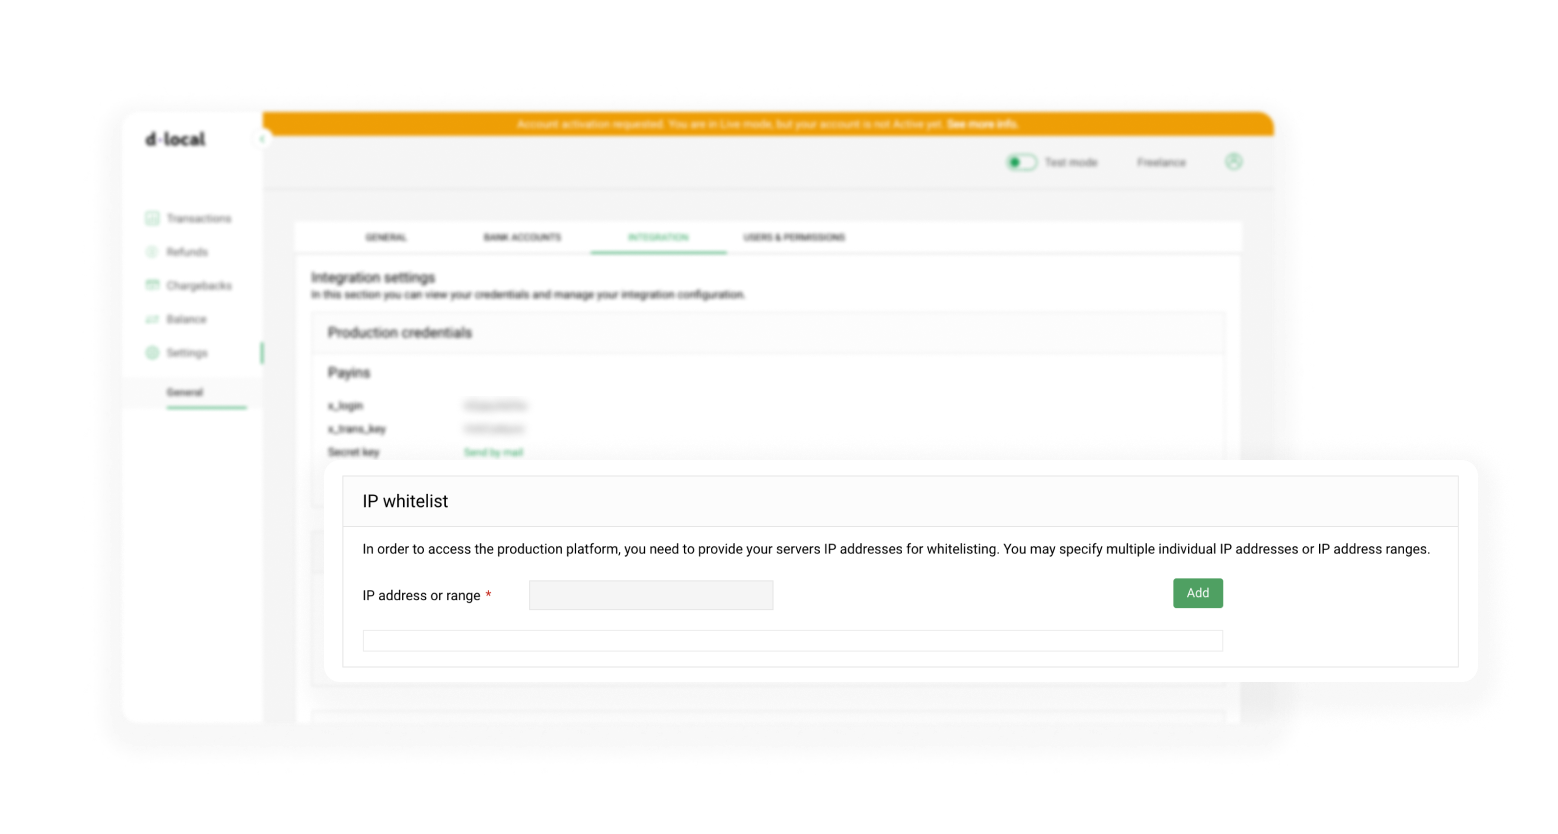
- Server's IP addresses for whitelisting. You may specify multiple individual IP addresses or IP address ranges.
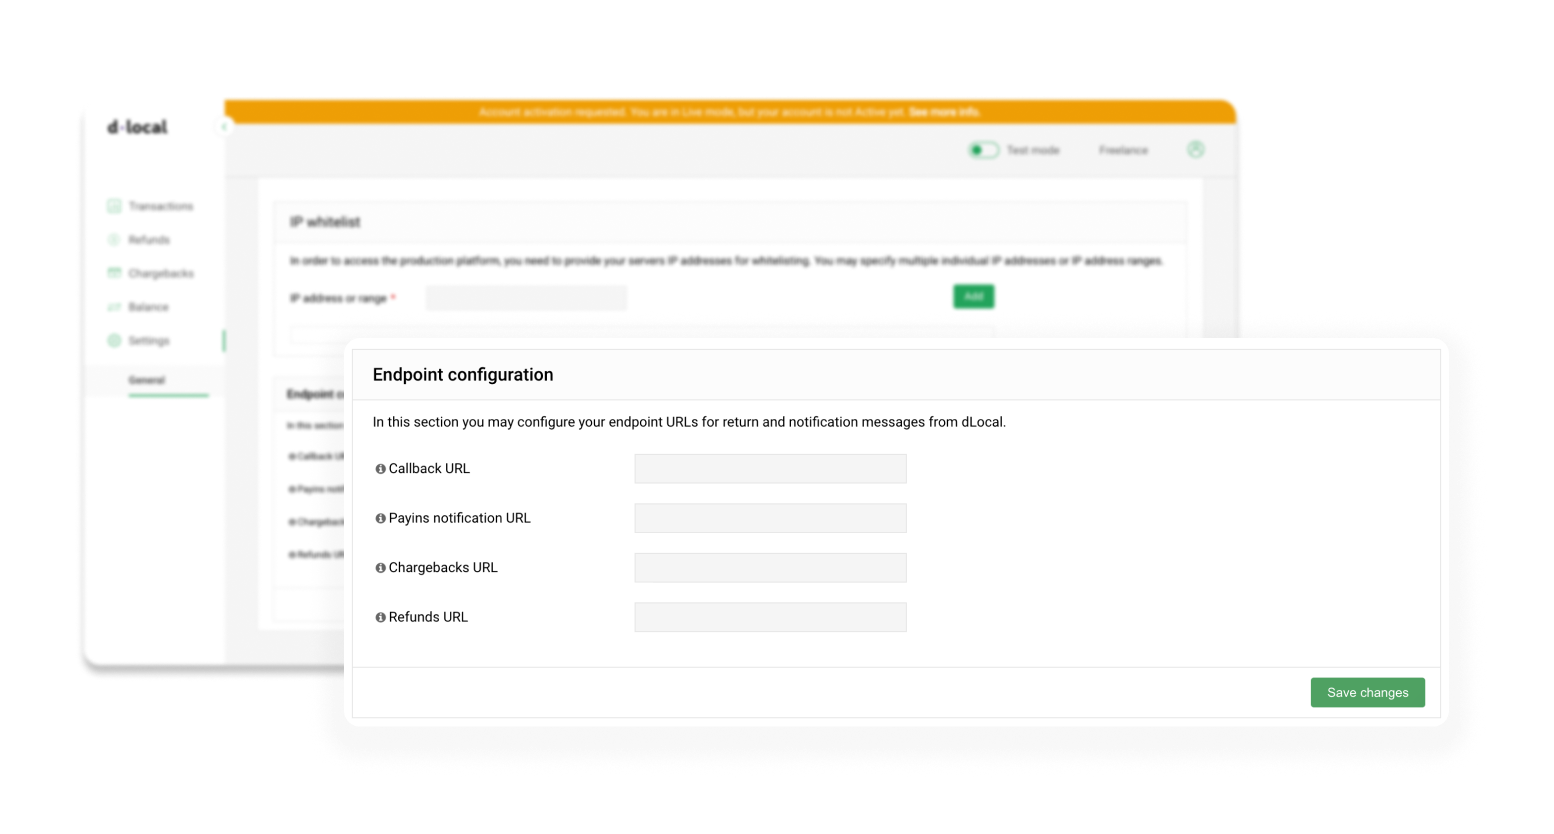
- Endpoint URLs for return and notification messages from dLocal.
IP whitelist
Add the IP addresses you want to whitelist:

Mutual TLS Certificates
If you can not provide one or more static IPs to whitelist due to infrastructure or network limitations, dLocal API has an alternative subdomain to authenticate your server using certificate-based authentication.
Before starting this process, coordinate it with the Technical Account Manager assigned to you for details.
Requirements
The following steps are required to use this method:
- Purchase a certificate for client authentication to a trusted Certificate Authority. Each certificate authority will have its own methods of delivering the signed certificate but none should ever have contact with the private key. The safest way is when you generate the key pair and create a signing request and send this certificate request to the Certificate authority.
- Once you have the certificate signed by the certificate authority, share that certificate, with the certification path (issuer, subCA, root). dLocal will allow this certificate to be used for authentication.
- Now you have to implement certificate-based authentication in your HTTP client application. This will depend on the programming language your client is coded in (Java, Python, PHP, Ruby, NodeJS), the framework used, and how you safeguard the private key and the certificate.
Implementation examples
Make sure to replace your credentials in the code examples.
package org.example;

import javax.crypto.Mac;
import javax.crypto.spec.SecretKeySpec;
import javax.net.ssl.HttpsURLConnection;
import javax.net.ssl.KeyManagerFactory;
import javax.net.ssl.SSLContext;
import javax.net.ssl.TrustManagerFactory;
import java.io.BufferedReader;
import java.io.FileInputStream;
import java.io.IOException;
import java.io.InputStreamReader;
import java.net.HttpURLConnection;
import java.net.URL;
import java.nio.charset.StandardCharsets;
import java.security.*;
import java.security.cert.CertificateException;

public class Main {
    public static void main(String[] args) throws KeyStoreException, CertificateException, IOException,
            NoSuchAlgorithmException, UnrecoverableKeyException, KeyManagementException, InvalidKeyException {

        String pass = "1234567890"; // Certificate and trusted store passwords

        // Load client certificate keystore
        KeyStore clientCertificateStore = KeyStore.getInstance("jks");
        try (FileInputStream clientCertificateFile = new FileInputStream("./src/main/resources/identity.jks")) {
            clientCertificateStore.load(clientCertificateFile, pass.toCharArray());
        }

        // Load trusted CA keystore
        KeyStore trustedCAsStore = KeyStore.getInstance("jks");
        try (FileInputStream trustedCAsFile = new FileInputStream("./src/main/resources/truststore.jks")) {
            trustedCAsStore.load(trustedCAsFile, pass.toCharArray());
        }

        // Set up KeyManagerFactory for client certificates
        KeyManagerFactory keyManagerFactory = KeyManagerFactory.getInstance(KeyManagerFactory.getDefaultAlgorithm());
        keyManagerFactory.init(clientCertificateStore, pass.toCharArray());

        // Set up TrustManagerFactory for trusted CAs
        TrustManagerFactory trustManagerFactory = TrustManagerFactory.getInstance(TrustManagerFactory.getDefaultAlgorithm());
        trustManagerFactory.init(trustedCAsStore);

        // Create SSL context
        SSLContext sslContext = SSLContext.getInstance("TLSv1.2");
        sslContext.init(keyManagerFactory.getKeyManagers(), trustManagerFactory.getTrustManagers(), new SecureRandom());

        // Set default SSL socket factory for HTTPS connections
        HttpsURLConnection.setDefaultSSLSocketFactory(sslContext.getSocketFactory());

        // API request parameters
        String x_login = "1955gdod";
        String x_trans = "j81xh5";
        String x_secret_key = "secretKey123";
        String date = "2022-11-24T15:42:57.130Z";
        String auth_signature = calculateSignature(x_login, date, x_secret_key, "");

        // Create HTTP connection
        URL url = new URL("https://sandbox-cert.dlocal.com/payments-methods?country=CO");
        HttpURLConnection connection = (HttpURLConnection) url.openConnection();

        try {
            // Set request method and headers
            connection.setRequestMethod("GET");
            connection.setConnectTimeout(30000); // 30 seconds
            connection.setReadTimeout(30000); // 30 seconds
            connection.setRequestProperty("Accept", "application/json");
            connection.setRequestProperty("Content-Type", "application/json");
            connection.setRequestProperty("User-Agent", "HTTPClient");
            connection.setRequestProperty("Accept-Encoding", "gzip, deflate, br");
            connection.setRequestProperty("Connection", "keep-alive");
            connection.setRequestProperty("X-Date", date);
            connection.setRequestProperty("X-Login", x_login);
            connection.setRequestProperty("X-Trans-Key", x_trans);
            connection.setRequestProperty("X-Version", "2.1");
            connection.setRequestProperty("Authorization", "V2-HMAC-SHA256, Signature: " + auth_signature);

            // Execute request and handle response
            int responseCode = connection.getResponseCode();
            System.out.println("Response Code: " + responseCode);

            // Read response body
            try (BufferedReader reader = new BufferedReader(new InputStreamReader(
                    responseCode >= 200 && responseCode < 300
                            ? connection.getInputStream()
                            : connection.getErrorStream(),
                    StandardCharsets.UTF_8))) {

                StringBuilder response = new StringBuilder();
                String line;
                while ((line = reader.readLine()) != null) {
                    response.append(line).append("\n");
                }

                System.out.println("Response Headers: " + connection.getHeaderFields());
                System.out.println("Response Body: " + response.toString());
            }

        } catch (IOException e) {
            System.err.println("Error executing HTTP request: " + e.getMessage());
            e.printStackTrace();
        } finally {
            connection.disconnect();
        }
    }

    private static final String HMAC_ALGORITHM = "HmacSHA256";

    public static String calculateSignature(String x_Login, String x_Date, String secretKey, String body)
            throws InvalidKeyException, NoSuchAlgorithmException {

        // Concatenate the required data for the signature
        String data = x_Login + x_Date + body;

        // Calculate the signature
        SecretKeySpec signingKey = new SecretKeySpec(secretKey.getBytes(StandardCharsets.UTF_8), HMAC_ALGORITHM);
        Mac mac = Mac.getInstance(HMAC_ALGORITHM);
        mac.init(signingKey);
        byte[] signature = mac.doFinal(data.getBytes(StandardCharsets.UTF_8));

        // Convert to hex string
        StringBuilder hexString = new StringBuilder();
        for (byte byteValue : signature) {
            hexString.append(String.format("%02x", byteValue));
        }
        return hexString.toString();
    }
}
import urllib3
import hashlib
import hmac

def calculate_signature(x_login, x_date, secret_key, body):
    """Calculate HMAC-SHA256 signature for dLocal API"""
    # Concatenate the required data for the signature
    data = x_login + x_date + body

    # Calculate the signature
    signature = hmac.new(
        secret_key.encode('utf-8'),
        data.encode('utf-8'),
        hashlib.sha256
    ).hexdigest()

    return signature

if __name__ == '__main__':
    SECRET_KEY = "secretKey123"

    # Disable SSL warnings for testing (not recommended for production)
    urllib3.disable_warnings(urllib3.exceptions.InsecureRequestWarning)

    # Create HTTP pool manager with client certificates
    http = urllib3.PoolManager(
        cert_file='./testseba.cer',
        cert_reqs='CERT_REQUIRED',
        key_file='./testseba.pkcs8',
        key_password='12345678'
    )

    x_login = '1955gdod'
    x_trans = 'j81xh5'
    date = '2022-11-24T15:42:57.130Z'

    # Calculate signature using our own implementation
    auth_signature = calculate_signature(x_login, date, SECRET_KEY, "")

    try:
        r = http.request(
            'GET',
            'https://sandbox-cert.dlocal.com/payments-methods?country=CO',
            headers={
                'Accept': 'application/json',
                'Content-Type': 'application/json',
                'User-Agent': 'HTTPClient',
                'Accept-Encoding': 'gzip, deflate, br',
                'Connection': 'keep-alive',
                'X-Date': date,
                'X-Login': x_login,
                'X-Trans-Key': x_trans,
                'X-Version': '2.1',
                'Authorization': f'V2-HMAC-SHA256, Signature: {auth_signature}',
            }
        )

        print(f"Response Status: {r.status}")
        print(f"Response Headers: {dict(r.headers)}")
        print(f"Response Body: {r.data.decode('utf-8')}")

    except Exception as e:
        print(f"Error executing HTTP request: {e}")
Endpoint configuration
Input the callback URL, the payins notification URL, and the refunds and chargebacks URL:

Endpoint details
| URL | Description |
|---|---|
| Callback URL | This is the URL to which the user will be redirected to after the ticket or bank flows ends or the user decides to return. We don’t send notifications here. |
| Payins notification URL | Payment status updates are sent to this URL. E.g. when a payment is created and the status is PENDING we will send a notification to this URL once the payment is either approved or rejected/expired. |
| Chargebacks URL | We send notifications for chargeback updates to this URL. |
| Refunds URL | We send notifications for refund updates to this URL. |
Business-related information
When you are done with the previous settings, and before starting to test in Sandbox, you can start adding some business-related information.
Access Settings > General and input information like company name, main contact information, bank accounts, and more.
Good practices
Add as much information as you can. This will make communications in the future much smoother.
User permissions
You can also start giving access to new users through Settings > Users & Permissions. Input the user email and set the level of access you want to assign them.
Updated 6 months ago
Ready to go live? Enable Live mode to start processing real payments with production credentials.
